Week 6 - Introduction to CSS
CSS
CSS allows you to create rules that specify how the content of an element should appear. For example, you can specify that the background of the page is cream, all paragraphs should appear in gray using the Arial typeface, or that all level one headings should be in a blue, italic, Times typeface. Once you have learned to write a CSS rule, learning CSS mostly involves learning the different properties you can use.
The key to understanding how CSS works is to imagine there is an invisible box around every HTML element.
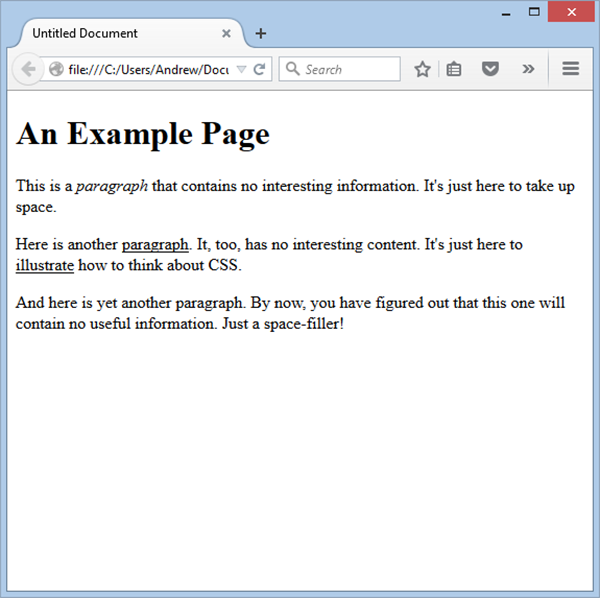
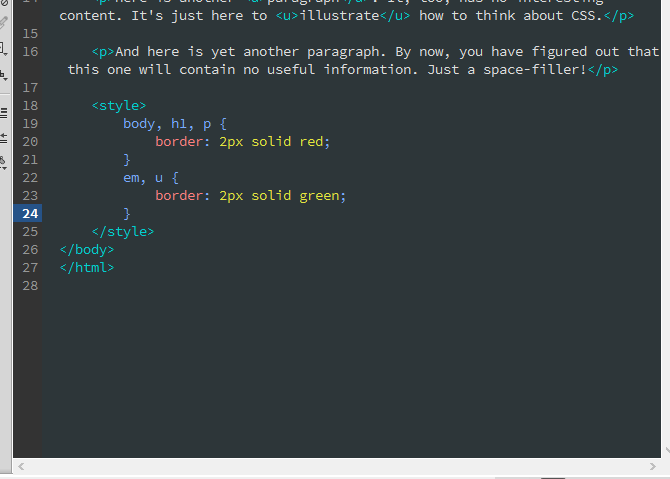
In the first image, you can see a very simple webpage. It has a <body> element, an <h1> element, three <p> elements, an <em> element, and two <u> elements. The body, h1, and p elements are block elements, while the em and u elements are inline elements.
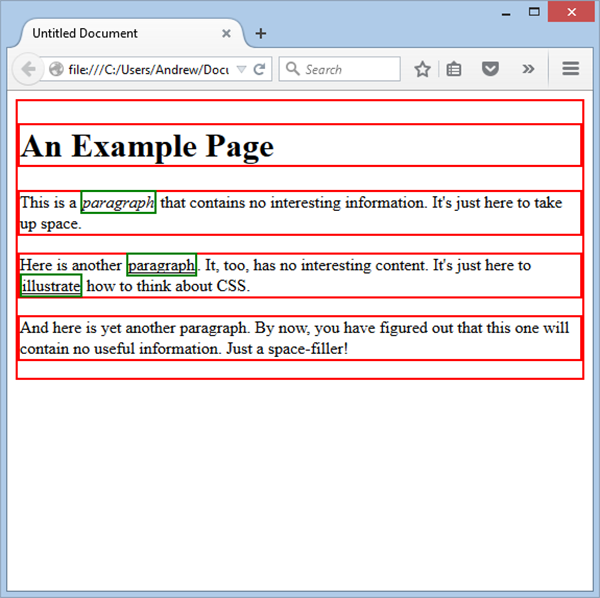
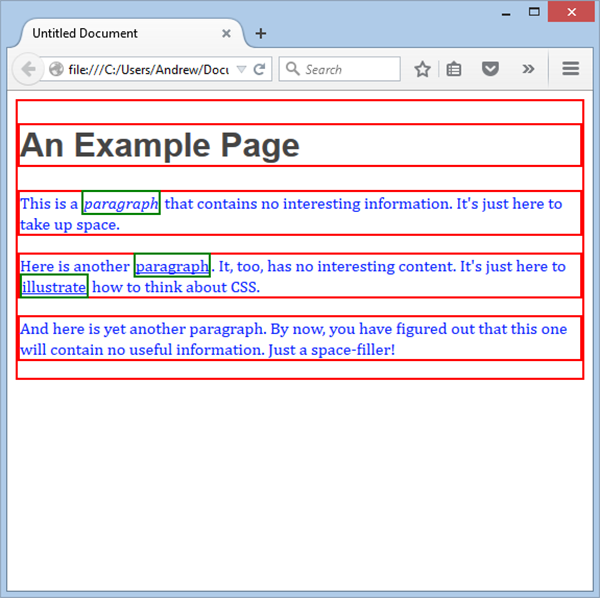
In the second image, you can see I have surrounded the block elements with red borders, and the inline elements with green borders. CSS treats your elements in this way, in that it "thinks of" each element as having a box around it. Block element boxes stretch the full width of the page, while inline element boxes contain do not.
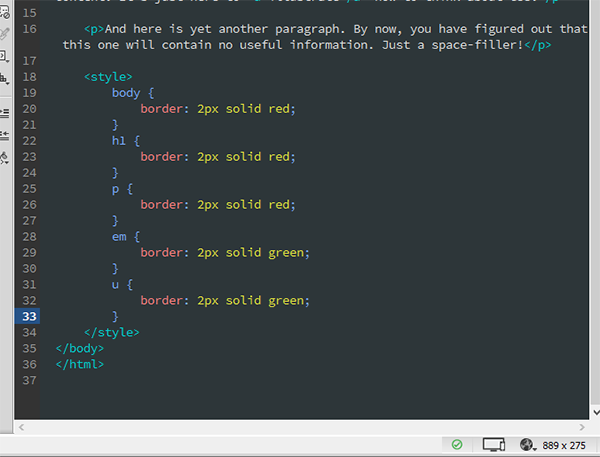
Above, you can see how I generated the red and green borders in the previous picture. If I am writing "internal CSS" (i.e. in the file itself) I simply enclose my rules between opening <style> and closing </style> tags.
Each element I want to style is paired with a rule (or set of rules) between a pair of curly brackets. Take the first one for example. The body part is called a selector, while the individual line inside the curly brackets is called a declaration.
You'll no doubt notice that there is a lot of repetition in that set of rules, in that three elements have the same red border, while two other rules have the same green border. You can apply the same declaration to multiple selectors by simply separating the selectors with commas, as below.
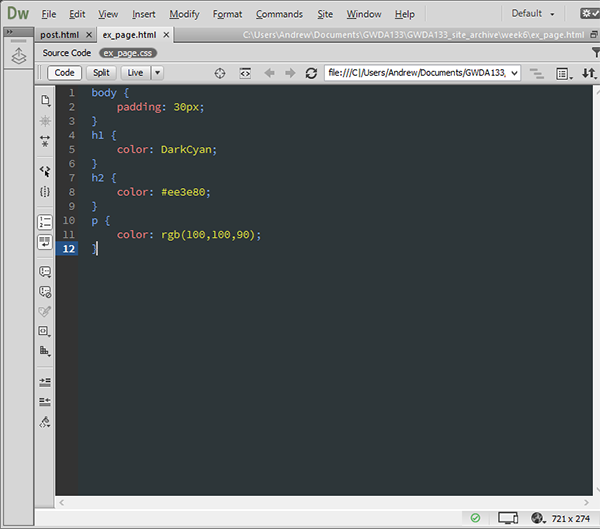
I could go further with that simple page and change the typefaces and colors of the h1 and p elements:
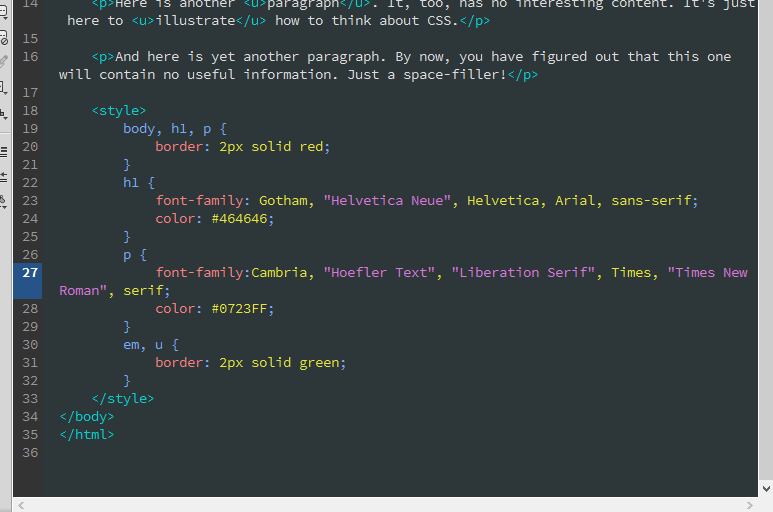
Notice how I have established two separate rules for the h1 and p tags. This is ok. In fact, you can have as many as you like. In this case, I have one rule for the things that the body, h1, and p elements have in common (the border), and additional rule for each thing they do not have in common (the font families and colors).
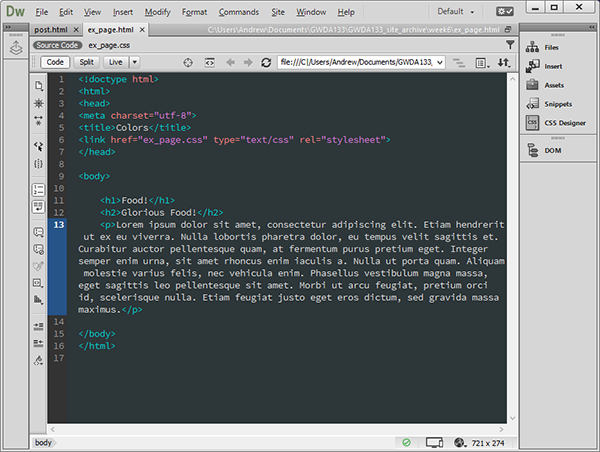
It's generally considered bad form to use "internal CSS" like I've been doing here. "Internal CSS" means the CSS is inside the HTML file, placed between script tags. It's better to use "external CSS," which means that the CSS is stored in another file and linked into the HTML file. It's easy to do.
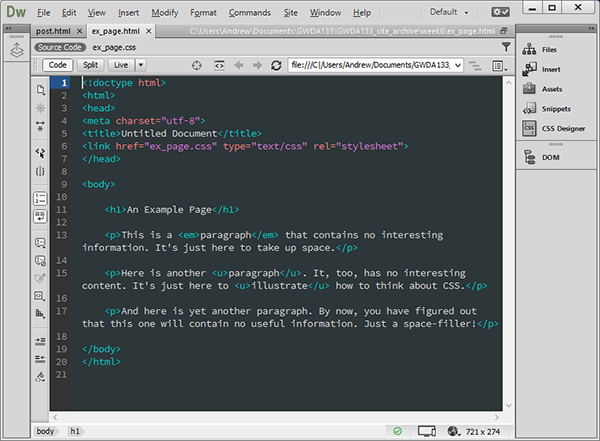

There are a couple things you should note in the above images. First, you use a <link href="filename.css" type="text/css" rel="stylesheet"> call to link in the external stylesheet. Second, you do not need <style> tags in the CSS file. (They wouldn't be understood anyway, since it's a CSS file and not an HTML file.) Your CSS file will simply be a collection of selectors with corresponding declarations inside of curly brackets. That's it!
CSS SELECTORS
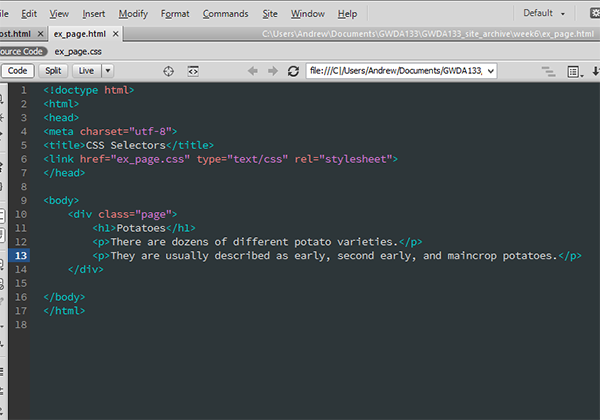
There are many different types of CSS selector that allow you to target rules to specific elements. CSS selectors are case-sensitive, so they must match element names and attribute values exactly. There are more advanced selectors that allow you to target elements based on attributes and their values. We will discuss them later. Here is a simple HTML file and a list of selectors and how to use them to target specific things in the file.
| SELECTOR | MEANING | EXAMPLE |
|---|---|---|
| Universal Selector | Applies to all elements in the document | * {} Targets all elements on the page |
| Type Selector | Matches element names | h1, h2, h3 {} Targets the h1, h2, and h3 elements |
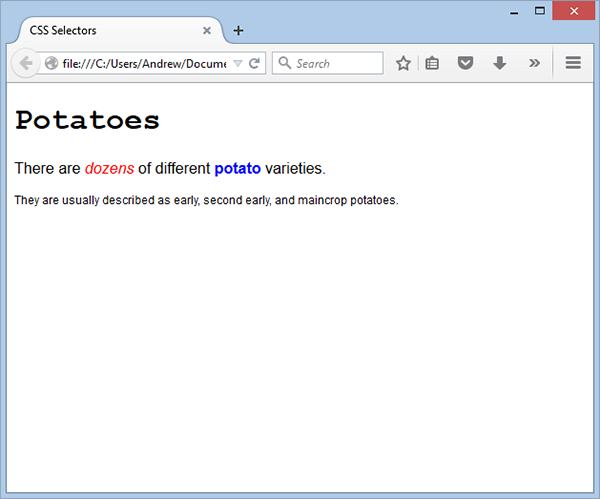
| Class Selector | Matches an element whose class attribute has a value that matches the one specified after the period (or full stop) symbol | .note {} Targets any element whose class attribute has a value of note p.note {} Targets only p elemnts whose class attribute has a value of note |
| ID Selector | Matches an element whose id attribute has a value that matches the one after the pound or hash symbol | #introduction {} Targets the element whose id attribute has a value of introduction |
| Child Selector | Matches an element that is a direct child of another | li>a {} Targets any <a> elements that are children of an <li> element (but not other <a> elements in the page) |
| Descendant Selector | Matches an element that is a descendant of another specified element (not just a direct child) | p a {} Targets any <a> elements that sit inside a <p> element, even if there are other elements nested between them |
| Adjacent Sibling Selector | Matches an element that is the next sibling of another | h1+p {} Targets the first <p> element after any <h1> element (but not other <p> elements) |
| General Sibling Selector | Matches an element that is a sibling of another, although it does not have to be the directly preceding element | h1~p {} If you had two <p> elements that are siblings of an <h1> element, this rule would apply to both |
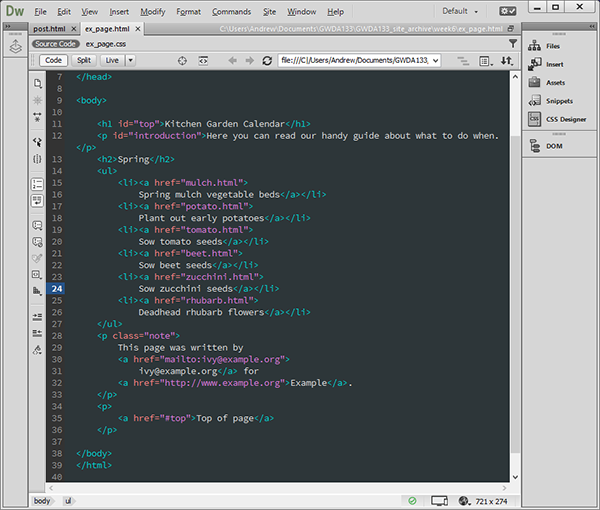
HOW CSS RULES CASCADE
Often you will have two or more rules that apply to the same element. If so, it is very important to understand which will take precedence.
The last rule takes precedence. What does this mean? If you have two identical rules, the latter of the two will take precedence. In the pictures below, the second <i> rule takes precedence over the first.
Specificity wins. What does this mean? If one rule is more specific than the others, the more specific rule will take precedence over more general ones. For example, h1 {} is always more specific than * {}, and p b {} is always more specific than p {}.
Important takes precedence. What does this mean? You can add !important after any property value to indicate that it should be considered more important than any other rules applying to the same element.

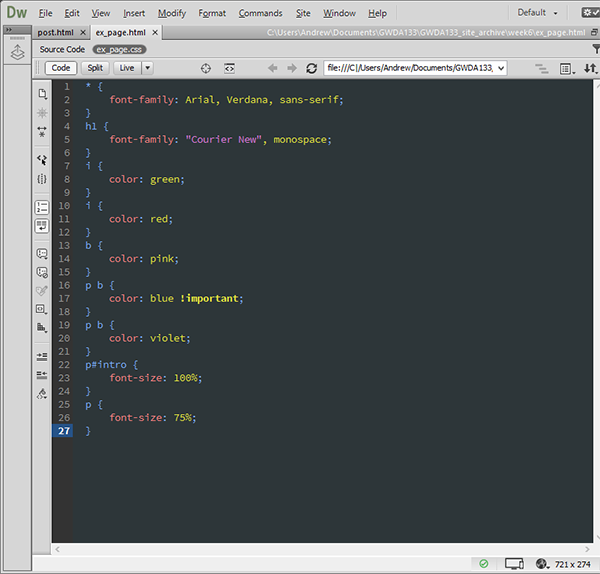
Specificity is illustrated by (among other things) the fact that the <h1> element has received the typeface specified in the h1 {} rule. "Last rule wins" is illustrated by (among other things) the italicized text being red and not green, and by the final paragraph being 75% and not 100%. Also, the fact that the bolded text is blue illustrates the fact that !important rules will take precedence.
INHERITANCE
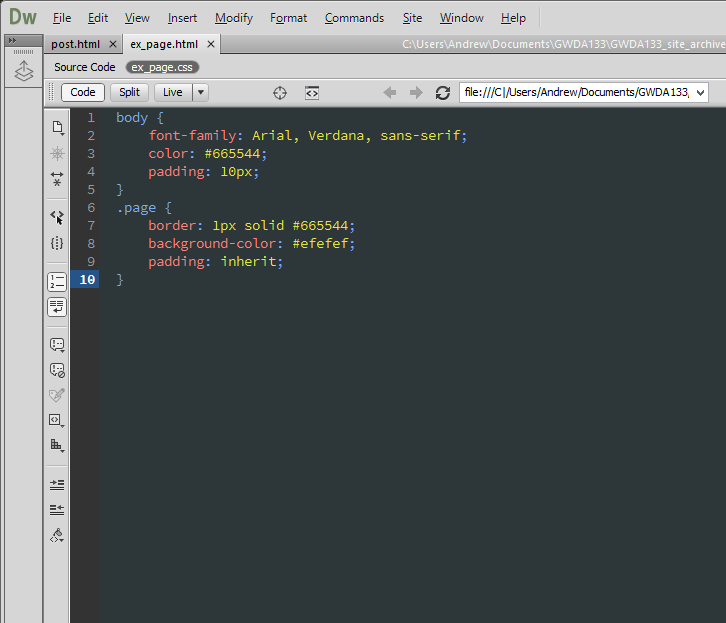
If, for example, you specify the font-family and color properties on the <body> element, they will apply to most child elements. This is because the value of the font-family and color is inherited by child elements. This saves you from having to individually apply this font-family or color to children.
In contrast, the background-color and border properties are not inherited by children. Why? This would make a complicated page VERY messy. Think on it for a sec.
If you absolutely want the children of an element to inherit one (or more) of its rules, simply use the inherit value in your CSS. Padding (internal spacing), for example, is one property that does not automatically inherit. In the example below, the <div> element is forced to inherit the body's padding by the use of the inherit value in the CSS.

COLOR
In this section we will discuss the following:
- How to specify colors (there are a few methods you can use to specify colors in CSS3)
- Color terminology (there are some terms that are helpful to understand when it comes to picking colors)
- Contrast (ensuring your text is readable)
- Background colors for behind either your entire page or parts of a page
FOREGROUND COLOR
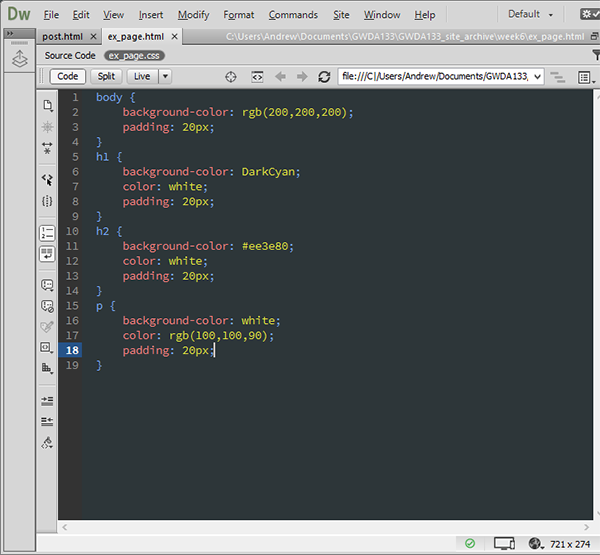
The color property lets you specify the color of text inside an element. You can specify colors in three ways (but we'll learn another later):
- RGB Values: These express colors in terms of how much red, green, and blue are used. Example: rgb(100,100,90)
- Hex Codes: These are (up to) six-digit codes representing the amount of red, green, and blue in a color, preceded by a pound/hash symbol. Example: #ee3e80
- Color Names: There are 147 predefined color names recognized by browsers. Example: DarkCyan
Text will default to black (rgb(0,0,0), #000000, black) if you do not specify a foreground color for an element (and have not specified one for the body).
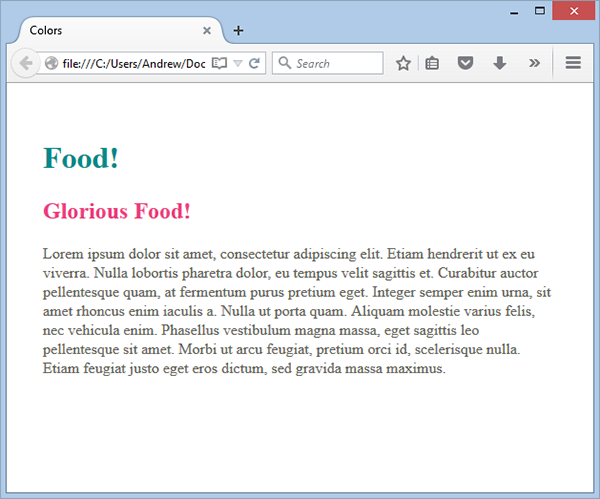
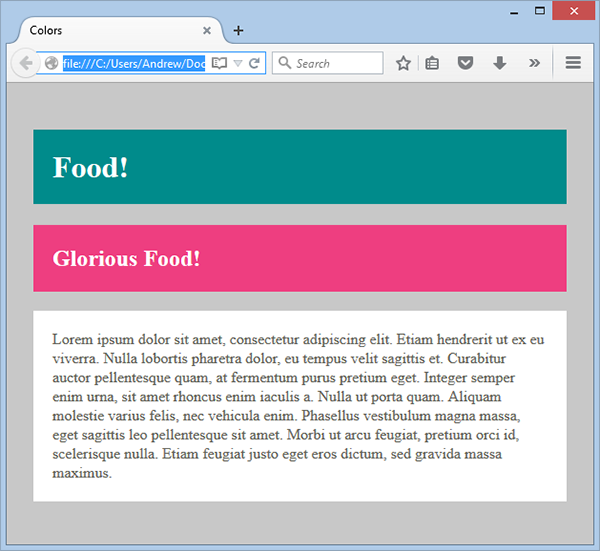
You can see in the above images that I've used all three methods for specifying colors. Which one you use is up to you. I tend to use hex codes, but some people prefer the rgb method. I very rarely use color words, because I like to be very specifid. (This is typical.)
BACKGROUND COLOR
As you'll recall from earlier, CSS treats each element as if it sits in an invisible box. You can color the background of that box with the background-color property. Just as with foreground color, you can specify background colors with hex codes, rgb values, and color names. Background colors default to transparent when you don't specify one. (Browsers default to white backgrounds, but you can change this. If you do change the browser default, that is what will appear as the background color for web pages without background colors.)
UNDERSTANDING COLOR
Each color on a computer screen is created by mixing amounts of red, green, and blue together. To find the color you want, use some sort of color picker. (There are color pickers in GIMP, Photoshop, Illustrator, etc.) Typically, you can specify the color as rgb, hex, or hsv (which we'll discuss later). Here are some things you should know:
RGB Values: These are values for red, green, and blue, and are expressed as numbers between 0 and 255. An entry of 0 means "none of that color," and an entry of 255 means "the maximum of that color." For example, rgb(102,205,170) has a red value of 102, a green value of 205, and a blue value of 170.
HEX Values: These represent values for red, green, and blue in hexadecimal code. For example, the hex code #66cdaa is the same as the previous rgb color. In other words, red 102 is equivalent to 66 in hex, green 205 is equivalent to cd in hex, and blue 170 is equivalent to aa in hex. (Don't bother trying to memorize the hex table. You have the color tool in Photoshop, so it isn't worth it.)
Color Names: Colors can be represented by predefined names. These are very limited in number, so it isn't a good habit to get into. The color we have seen above is also known as MediumAquaMarine. In other words, MediumAquaMarine is the same as rgb(102,205,170) and #66cdaa.
Hue: Hue is very near to our colloquial use of color. Technically, a color can have saturation and brightness as well as hue.
Saturation: Saturation refers to the amount of gray in a color. Maximum saturation occurs when there is no gray, and minimum saturation occurs when the color is mostly gray. Saturation can also be thought of as the intensity or purity of a color.
Brightness: Brightness (aka "value") refers to how much black is in a color. At max brightness, there is no black in the color. At minimum brightness, the color would be very dark.
CONTRAST
When picking colors for your page, it is important to make sure there is enough contrast for text (and anything else) to be legible.
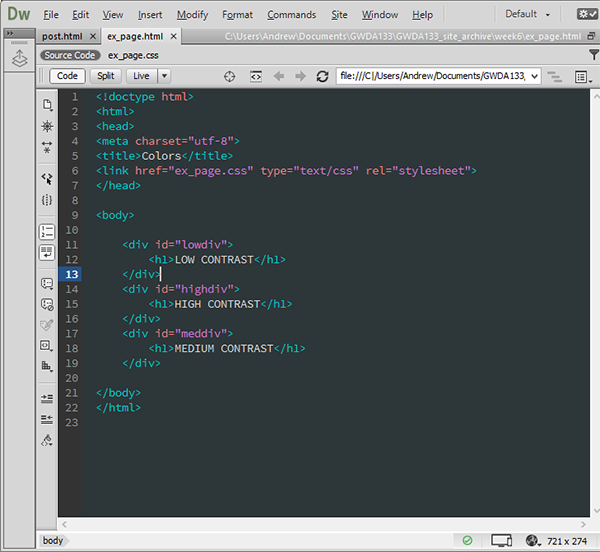
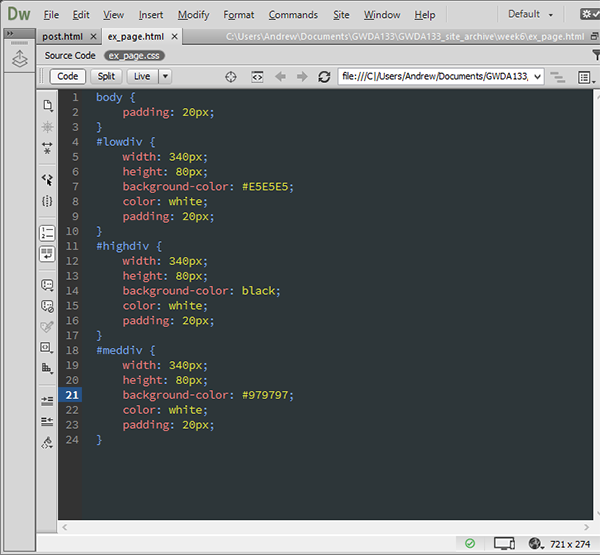
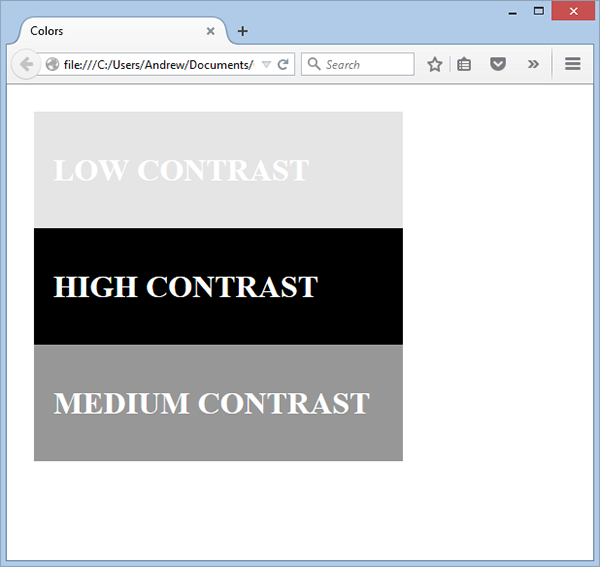
Low contrast makes text much harder to read. This is annoying for the typical user, but can be a big problem for those with visual impairments and color blindness. Avoid low contrast when writing text!
High contrast makes text much easier to read. However, long sections of text should not have very high contrast. It is stressful on the eyes.
Medium contrast is good for long runs of text and can improve readability. You can reduce contrast by using dark gray text on a white background, or an off-white text on a dark background.
CSS3: OPACITY
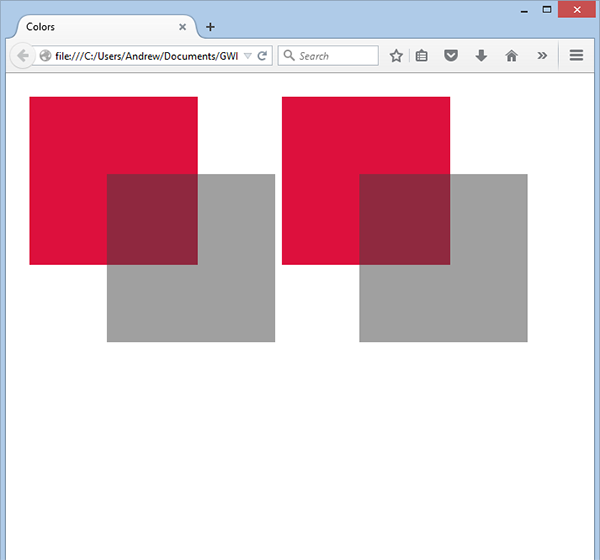
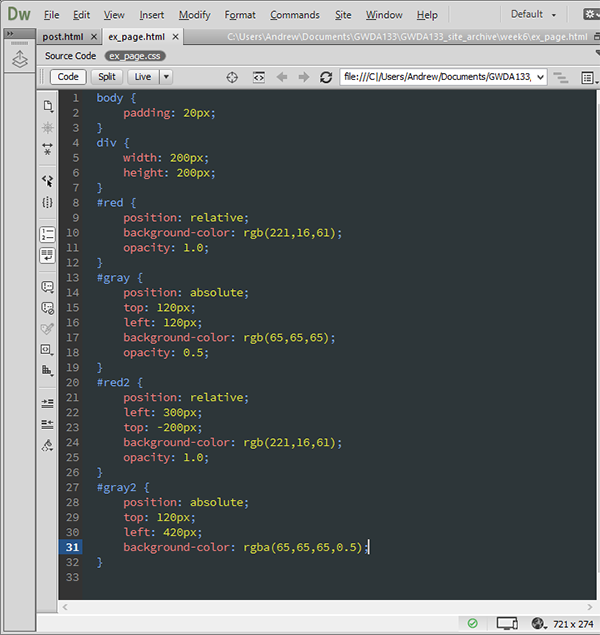
CSS3 introduced a new property called opacity, which allows you to specify the opacity of an element and any of its children. This value is between 0.0 and 1.0 (0.0 being completely transparent, and 1.0 being completely opaque).
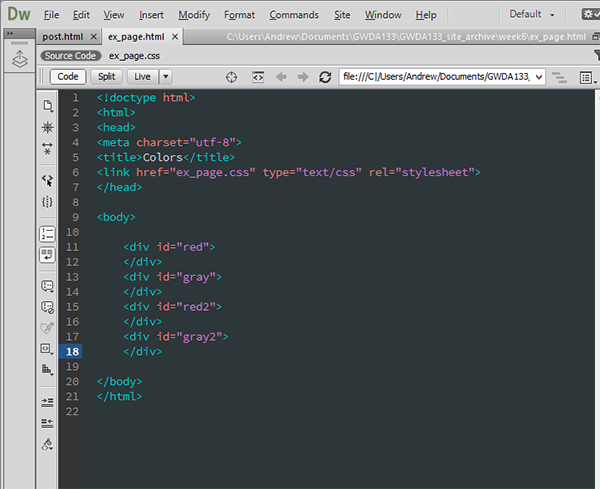
This can also be achieved with the CSS3 rgba property. It takes the place of rgb, adding in a fourth parameter - the alpha value (same as opacity - it ranges from 0.0 to 1.0). Note: Some browsers will not recognize these properties, so things you intend to show up with, say, opacity 0.5 will show up as default (opacity 1.0). See below for an example illustrating the use of opacity and rgba. (Dont' worry about the position, top, and left stuff. We'll get to that later. It's just what I used to move the boxes around the screen.)
CSS3: HSL COLORS
CSS3 introduced a new and intuitive way to specify colors using hue, saturation, and lightness values.
HUE: This is the colloquial idea of color. In HSL colors, it is often represented as a color circle where the angle represents the color, although it may also be shown as a slider with values from 0 to 360.
SATURATION: Saturation is represented as a percentage of gray in a color. 100% is full saturation (no gray), and 0% is no saturation (gray).
LIGHTNESS: Lightness is the amount of white (lightness) or black (darkness) in a color. Lightness is represented as a percentage, with 0% being black and 100% being white. 50% lightness is normal. This is also referred to as luminosity.
Homework 6 - Part 1
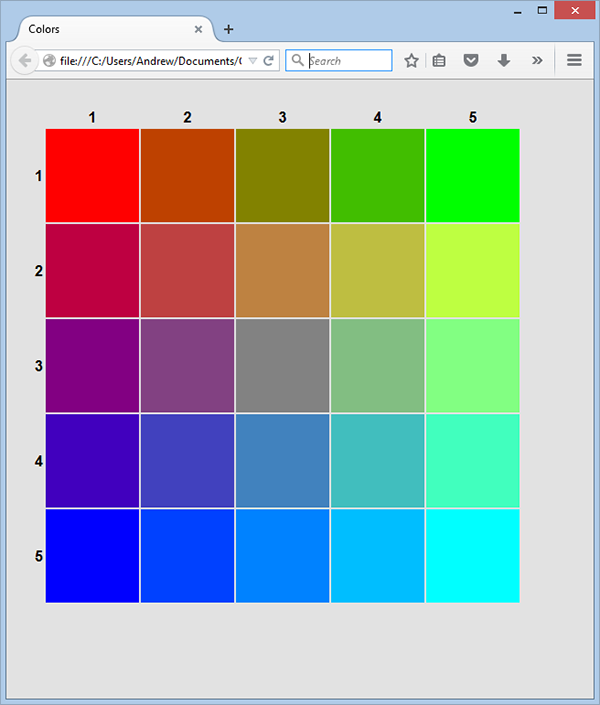
Make a page that looks like the one below. Use a table to make the grid, and make sure your <td> elements are styled to be 100px wide and 100px high. Use rgb(x,y,z) for your color declarations. Hint: You'll want to give each td its own id, and then find the rgb(x,y,z) pattern in the image. Start with the ones that are easiest (the primary color corners - top left, top right, and bottom left) and set those first (to make it easier). Then start subtracting/adding to rgb values to get the rest. (I worked in increments of 65.)
Homework 6 - Part 2
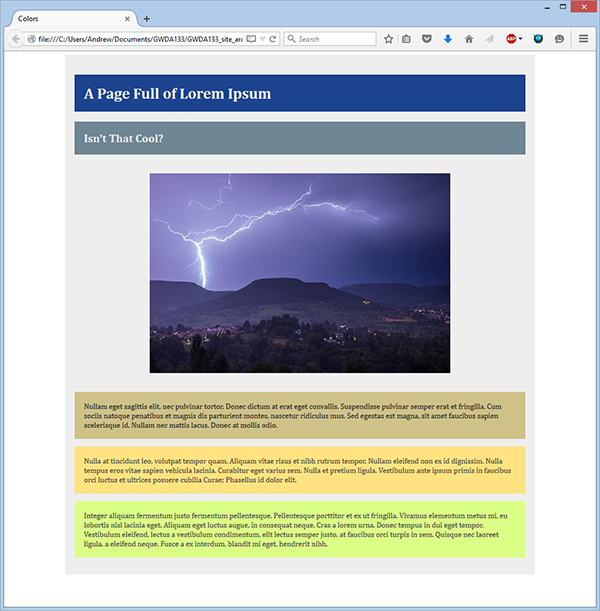
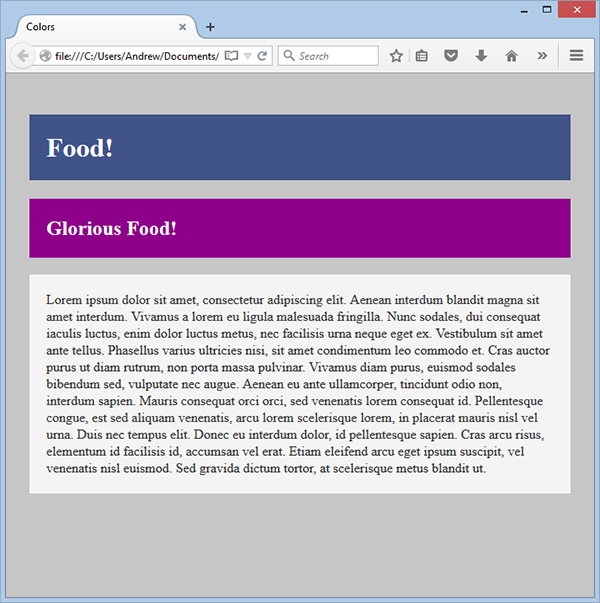
Make a page that looks like the one below. You'll need to use an h1, an h2, and three p tags. In addition, you'll want to use two div tags (one for the entire content, and one for the image). Use a FREE image that is exactly 640 px wide, and make the page 960 px wide. You can use the colors you like, but make sure the page looks - structurally - like this one. In today's lecture you've seen just about everything you need to get this one done. The only declarations you haven't seen yet, but will need, are:
margin:auto - this centers content in the element
margin-left: *some number here*px - this gives a margin on the left of the object (replace *some number here* with the number of pixels you want)