Week 1 - HTML and CSS Review
GoCloud1: From Mockup to Code Tutorial
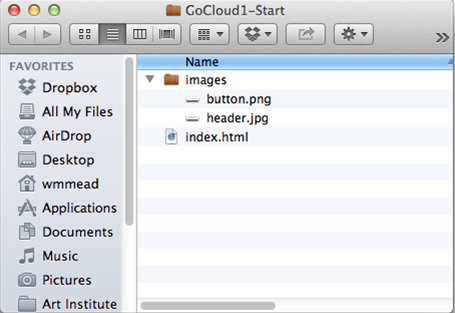
Download these files before proceeding
Tutorial
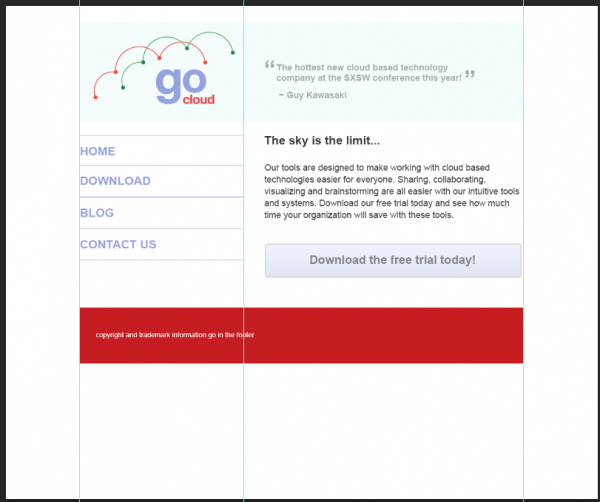
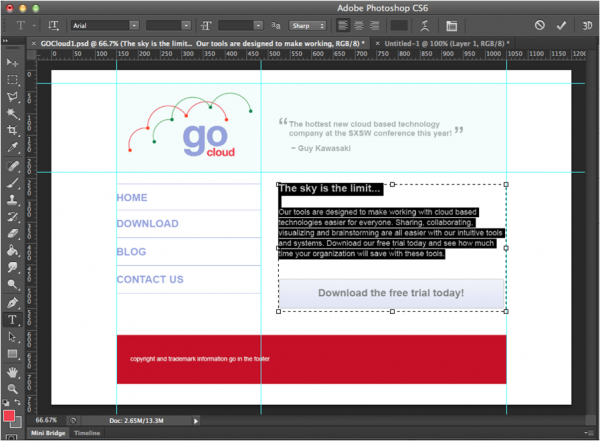
We will be taking this design from Photoshop and turning it into HTML and CSS.
The start folder has a folder with two images we need, pulled from the Photoshop file, and it has an index.html file.
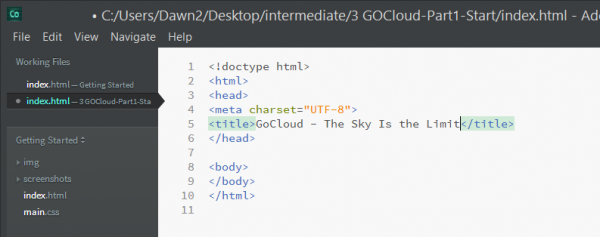
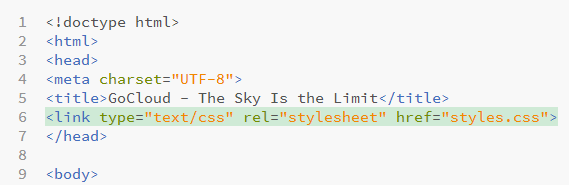
1. Open that file with Adobe Edge Code (or Dreamweaver, or your favorite code editor). You will notice that the html file is using the nice, simplified HTML5 doctype.
2. Go ahead and add a title for the page. Remember, this is very important for Google.
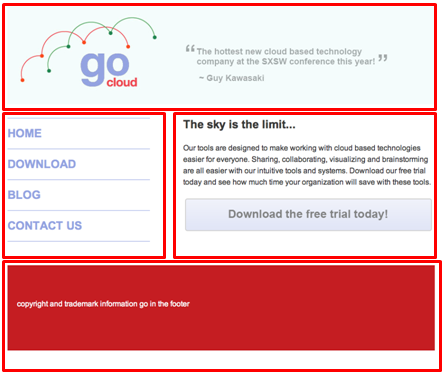
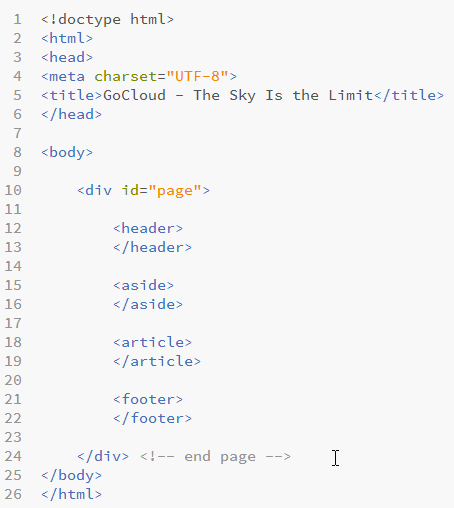
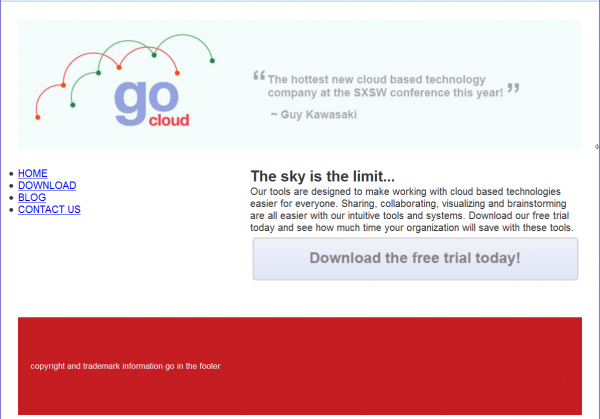
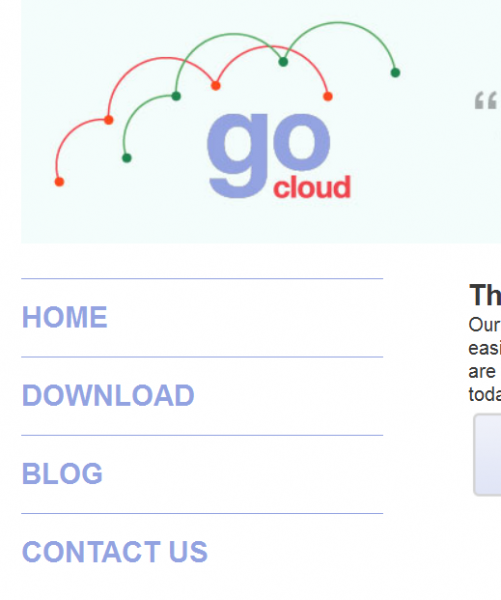
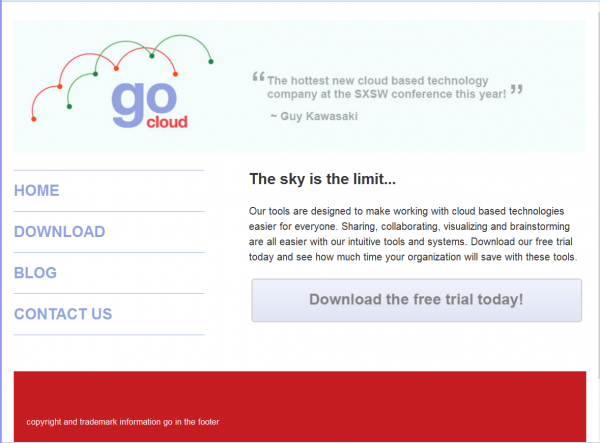
There are four main sections to this page inside a wrapping container: a header, a sidebar, the main content area, and a footer.
3. Let's add markup to define each of these areas.
4. In the header, put the image that is in the folder with the logo and the quote.

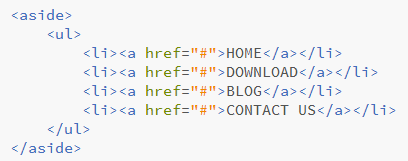
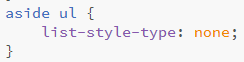
5. In the sidebar, add an unordered list that will be used for navigation.
6. Go back to the Photoshop file to pull out the content for the main content area and also for the footer.
7. Put the subtitle in an h2 and the rest in a paragraph.
8. Add the button from the images folder and put a link (to nowhere) around it.

9. Put a paragraph in the footer with the content from the Photoshop file.

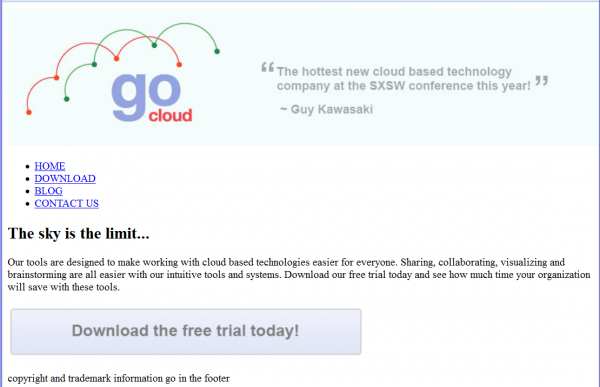
All of the content for our page is in place. The rest will be done with CSS.
10. Add a link to an external stylesheet in the head. We'll build this file next.
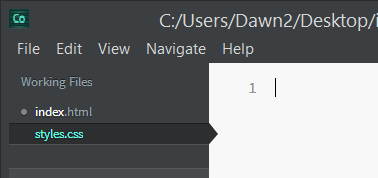
11. Make a new file and save it as styles.css in your root folder.
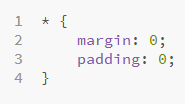
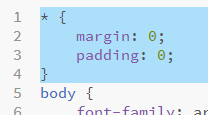
12. The first rule to add is a very simple reset rule. This will remove padding and margin from all elements. We will replace this with a better reset rule later, but for now we will keep it simple.
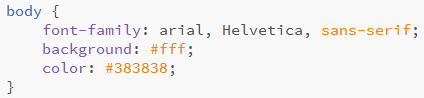
13. The next rule sets some basic styles for the whole page. If you go back to the Photoshop file, you will notice that all the type on the page is using the Arial typeface. The color of the text on the file is not black, it is a dark grey. Also, set the background of the page to white.
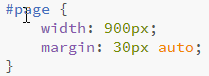
14. The next rule will attach to the div id=”page” markup. This rule is setting the width of the whole container for the page. Notice the margin rule is a shortcut for margin: 30px auto 30px auto; Auto centers the container from the left and right edges. 30 pixels is the margin at the top and bottom of this container.
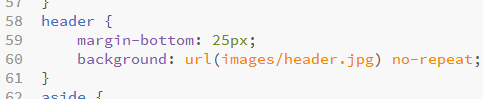
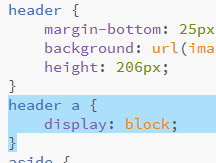
15. The header rule will attach to the header markup. Set only a bit of margin on the bottom. Why don’t we have to set a width or a height?

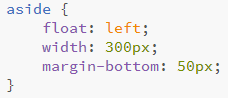
16. The aside rule attaches to the aside markuup. It floats left and from the Photoshop file you can see that it needs a width of 300 pixels. Also, add a margin to the bottom.
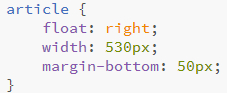
17. Next, add the article rule, which floats right and has a width of 530 pixels. This leaves a gap between the two floated elements of 70 pixels.
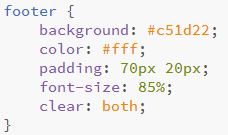
18. The footer rule will define the section of the page with the footer markup. Again, get the color for the background from the Photoshop file. Also set the color of text in this section, and the padding will give it some height. Most important is the clear:both statement. You have to clear the floats to get the browser back into the mode of rendering the elements in a top to bottom order.
At this point, our layout is complete. We just need to add some additional styling for type and our navigation to pull this all into order.
19. This rule will remove the bullets from the unordered list inside the sidebar.
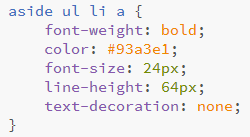
20. This next rule will put a border on the top of each list item in the list. The color was pulled from the Photoshop file.

21. Most of the styles get attached to the actual anchor tag, inside the list item, inside the unordered list, inside the aside. Here you set the color, font weight, size, line height and remove the ugly underlines for the links.
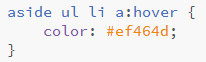
22. Finally, add a pseudo-class to the anchors for when the user hovers over those links to change their color. It is a nice, interactive touch.
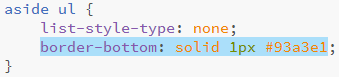
This is looking pretty good, but for a final touch let's add a border to the bottom of the contact us link at the bottom of the list.
23. There are a couple ways to do this, but the easiest is to go back to the rule for the aside ul and just put the same border on the bottom of that element that we had put on the top of the list items.
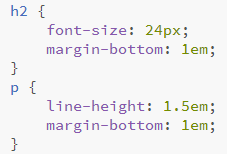
24. Finally, add these two last rules to round out the look of the design for the page. Just put some margins back on the bottoms of these text elements, since they were removed by the reset. Also, set the size of the h2 and add some line-height to the paragraphs.
We have the look we wanted, but before we leave this design, let's change a few things to make the code better.
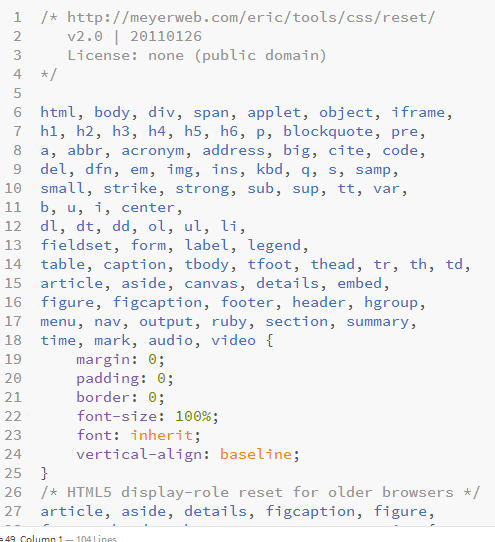
25. The next thing we want to do is replace the simple css reset we have with a more robust one. Here is the one on Eric Meyer's website, which can be found here: Eric Meyer's Reset

26. First, remove this rule entirely. Just delete it from the page. Then, paste in the rule from Eric Meyer's website in its place. The Eric Meyer rule is really long, but don't let that concern you. It should just go at the top of the stylesheet, before all your rules.
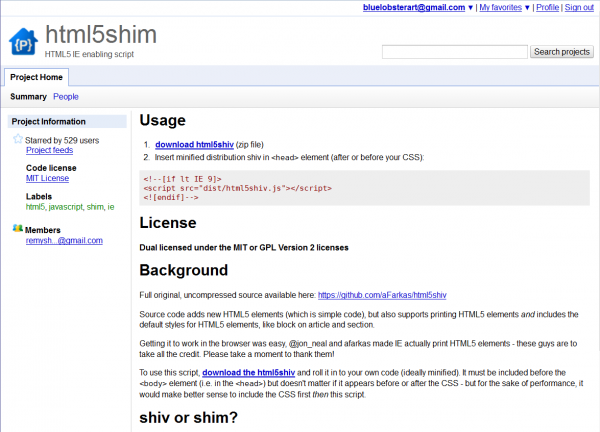
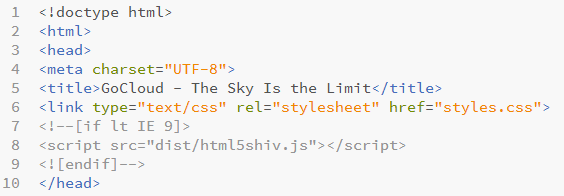
One more thing we should do for old browsers. We should get this piece of JavaScript, which will make old versions of Internet Explorer (9 and earlier) understand the new HTML5 elements.
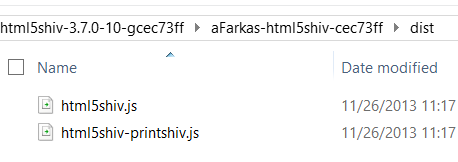
27. Go to this website: HTML5SHIM
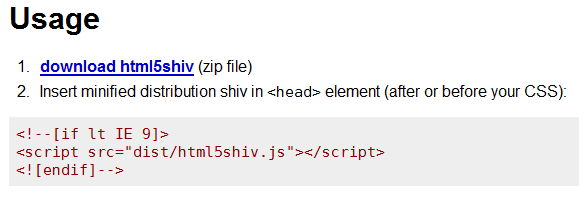
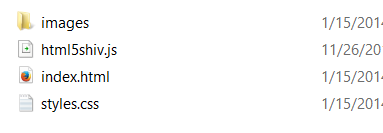
28. Download the html5shiv zip file and unzip it, and then move the file called html5shiv.js that is inside the dist folder into the root folder with our project.
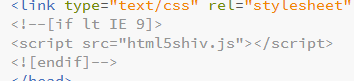
29. Then just paste the code at the top of the page in the head file and remove the dist/ part of the path. This script will only run if you are using IE with version numbers less than 9.
The last thing I want to discuss regarding this project is the difference between an image on the page, and an image as the background of an HTML element. Currently, the header is an image on the page…

This is fine, but if you have the same header on hundreds of pages, it’s a lot of unnecessary code, and tedious to change. Instead, it might be better to set the image as a background for the header.
30. Delete the img element from the header in index.html.

31. In styles.css, add a background image to the header selector.
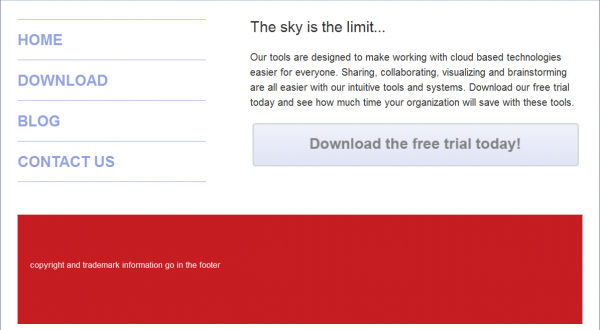
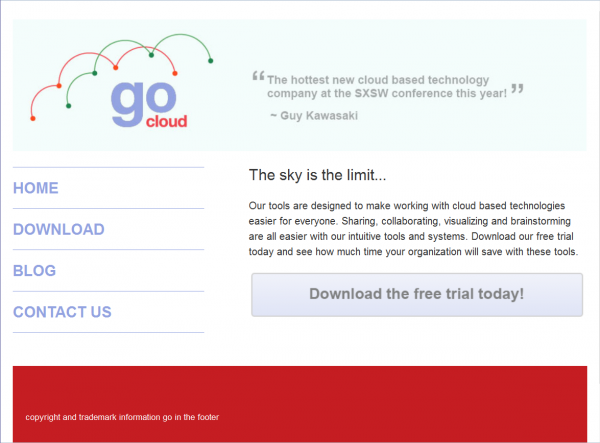
If you look at the page in the browser, you will not see the header. What gives?
Because the header element is now empty, it has collapsed.
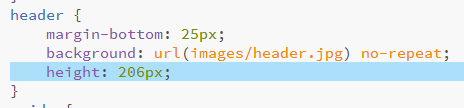
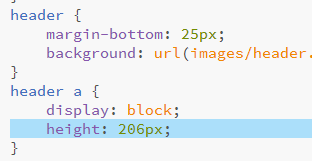
32. The header image is 206px tall, so set the height for the header selector to 206px.
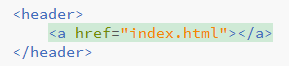
OK, so how do we make the header image link to the home page if there's no img tag to wrap the link around?
33. Put an empty a element in the header that links to index.html.
34. Add a new rule for header that changes this inline element to a block element.
35. Move the height declaration from the header selector down to the new header a selector. This makes the entire header image clickable.

GoCloud2: Homework
Download these files:
Specifications
Code the second version of the GoCloud site, as shown in the Photoshop file linked above. Be sure to use:
- HTML5 tags: header, aside, article, footer
- Eric Meyer's Reset
- external stylesheet
- HTML5SHIM